Wednesday, November 28, 2012

Chocolate Mint Brownie Bites


Hello and Welcome to Adventures In Baking!  I don't know about you but I'm ready to jump right into Holiday Baking.  I've seen so many recipes I'd like to try that it's been extremely difficult to narrow down my selection.  With all the apple and pumpkin inspired goodness I've tried this fall, it's been awhile since I focused on chocolate.  So that's what we're testing out today, chocolate with a little mint.  I'm using a recipe I found at Tasty Kitchen and you can get all the details right here. 


The ingredients.  Butter, sugar, eggs, mint extract and chocolate.  Easy enough.


Let's get started.  Melt chocolate in a bowl in the microwave.  Remove from microwave and stir in 8 Andes Mints until it's all melted.  Let cool slightly.  I followed the directions on the box for melting the chocolate, but I zapped it for 30 more seconds once I added the Andes Mints so it would be nice and smooth.

 
Next step.  Cream butter and sugar.  Beat in eggs one at a time.  Drizzle in the cooled chocolate mixture slowly until it's combined.  Add flour and mix thoroughly.  Add mint extract and mix it again.


Final step.  Use a cookie scoop to scoop batter into mini muffin tin.  Bake about 15 minutes. 

 
Turn the brownies out upside down to cool. 


Combine 25 Andes Mints in a bowl with butter and chopped chocolate. Microwave and stir until melted and smooth.  Dip the brownie 'tops' in the chocolate.  Chop the remaining Andes Mints and sprinkle them on top.
 
 
Taste test.  Ohhh yeah.  These smell just like Thin Mint Girl Scout cookies.  And they taste really good too.  They're much lighter than I thought they'd be.  I thought they'd be a thick, heavy, very chocolaty brownie, but they're reasonably light in texture.  They're very cute.  There's a lot of unwrapping mints and chopping chocolate so I wouldn't want to make a lot of these.  They would be nice to make as a fun little treat for a few special people on my Christmas list.

Are you ready to start your holiday baking?
Enjoy!
-Teddra 

Thursday, November 22, 2012

Spiced Pear Cake with Browned Butter Icing


Hello and Happy Thanksgiving!  I love that this day is about taking a little time to be thankful for the good things in life - family, friends, health and the chance to be together.  And today's Adventures In Baking recipe is a great one to share with the special people in your life.  I used the recipe from Recipe Girl that can be found here.  Instead of making two loaves of bread, I baked one loaf and 12 mini bundt cakes.  Aren't they adorable?


The ingredients.  Quite a few components.  All purpose and whole wheat flour to make them a little bit healthier.  Pears, applesauce and milk.

 
Let's get started.  In a medium bowl, toss the pears with the white and brown sugars, cinnamon and nutmeg.  Set aside.  (Note** Lots of bowls used with this recipe)
 
 
In a medium bowl, whisk together the flours, baking powder and salt.  Set aside.
 
 
 Next step.  In a large bowl, whisk together the sugar, eggs, milk, oil and applesauce.  Whisk in the dry ingredients until they are just combined - don't over mix.


Stir in the pears and all their juice. 


Divide the batter between you pans.  I baked the mini bundts 20 minutes and the loaf 60 minutes.


Final step.  Let the cakes cool for 15 minutes and then turn them out onto a rack to cool.


And the icing,  Melt butter in a small saucepan over medium heat.  Heat and stir for 5-7 minutes until the butter is lightly browned.  Remove it from the heat and pour it in a bowl.  Whisk in 1 cup of powdered sugar.  Add 3 teaspoons of water and the vanilla.  Whisk in more powdered sugar a little at a time until it's thick but pourable.  Drizzle icing onto the cakes.

 
Taste test.  Oh so good.  The applesauce and pears keep it moist and the icing adds just the right amount of sweetness.  Ummmmm.... had to taste another one!  Yes, still super good.  This may be one of my favorite things I've made lately.  I wrapped the loaf and placed it in the freezer for later but shared the little bundts with the co-workers.  Everyone said they were really good so try them out for yourself!
 
Have a safe a happy holiday!
-Teddra


Wednesday, November 14, 2012

Mini Pecan Pie Cookies


Hello and Welcome to Adventures In Baking!  This week we're turning our attention away from pumpkins and toward another Fall and Thanksgiving staple, Pecan Pie.  But, instead of the traditional pecan pie, we're making bite size cookies that look just like pecan pie.  I find traditional pecan pie to be too sweet so, in my personal opinion, I like these much better because there's less sugar filling.  I'm using a recipe from Bake or Break that you can find right here.


The ingredients.  I used pre-made pie crust by Pillsbury.  The package contains 2 9-inch crusts which was the perfect amount for the quantity of filling I made.


Let's get started  Roll out the first pie crust and cut circles to fit a mini muffin pan.  I'm not gonna lie, I struggled with this one.  The only circle cookie cutter I have is 3 inches in diameter which is way too big for my little muffin pan.  I thought "I can do this" and "how hard can it be" .  Uh, yeah.  Want to see my first effort?  Here ya go:

 
It wasn't pretty.  After the sixth or seventh semi-circle I decided I needed to regroup.  I have all kinds of punches and dies to make every size of circle there is with my papercrafting supplies, surely I have something that will work with dough.  I thought about punching a circle and tracing around it with a knife but that seemed like a lot of work.  Then my eyes just happened to fall on the brand new can of Pam Baking Spray sitting out on the counter.  Hmmmmm.  That might just work.  Viola!  Circles cut to the perfect size. 
 
 
Next step.  Now onto the filling.  Mix together eggs, sugar, corn syrup, butter and flour. 
 
 
  Final step.  Add pecans, vanilla and salt.  Pour filling into shells and bake.
 
 
 Taste test.  Yum. 
 
 
The clean up.  I just wanted to show you a picture of what my free-form pie crust circles (??) looked like before I switched to using the plastic lid on the baking spray.  I still used them cause I didn't want to waste the crust.  They were a little difficult to get out of the pan because the filling stuck to the sides while the pretty ones just popped right out.  Oh well, they still taste good.  I managed to make 37 mini pecan pie cookies but if I hadn't wasted so much before I figured out how to cut the crust, I probably could have made about 48. 
 
Enjoy-
Teddra

Monday, November 12, 2012

3rd Birthday


Hello and Happy Veteran's Day!  I managed to sit down for a little bit yesterday and produce a 2 page layout from my 3rd Birthday.  I'm slowly but surely working my way through the big box of childhood photos I have. 


It's very interesting to look back at the 70's!  I'd say from these pics I was seriously into dolls, although why I'm dressed like Little House on the Prairie (complete with a bonnet) is a mystery. 
 
Have a great week!
-Teddra
 

Wednesday, November 7, 2012

Pumpkin Oatmeal Bars


Hello all and Welcome to Adventures In Baking!  This week, I have one final pumpkin dessert to share.  I'm using a recipe from Taste of Home. 


The ingredients.  Quite a few items for a three layer bar.  The milk, honey and maple syrup seemed a little odd.


Let's get started.  Combine and cake mix and oats.  Set aside 1/2 cup for topping.  Add the butter, honey and water to the remaining cake mixture. 


Next step.  Press the mixture into the bottom of a 9 x 13 inch baking dish coated with cooking spray.


Final step.  In a large bowl, beat the pumpkin, cream cheese, milk, brown sugar, maple syrup, cinnamon, vanilla, allspice and cloves until blended.  Add egg and egg white.  Beat just until combined.  Pour over crust.


Taste test.  Combine the walnuts, butter and reserved cake mixture.  Sprinkle over filling.  Bake.

Well, this is a tough one.  I wanted to like it, but I just don't like pumpkin.  After a few bites, I separated the layers and ended up only eating the oatmeal layer.  Now that I really like.  There's just something about pumpkin that doesn't work for me.  Maybe it's the texture.  I think if you're a pumpkin lover this would be just the thing to serve as an alternative to a traditional pumpkin pie.  It's certainly easy enough.  And it smells soooo good.

So that's it for my pumpkin adventure.  We're wrapping up Thanksgiving desserts next week with a non-pumpkin dessert and then we're diving head first into Christmas desserts.  I can't wait.  I can smell the peppermint already.  That may be because I've already been stocking up on Andes Peppermint Baking Chips!

Enjoy
-Teddra


Thursday, November 1, 2012

Pumpkin Roll


Hello and Welcome to Adventures In Baking!  I think I mentioned in the last episode that I was heading home for the weekend for Thanksgiving and no, that wasn't a typo.  I honestly can't remember the last time I had Thanksgiving dinner with my parents.  I do remember it involved turnips so maybe I've just blocked it from my memory, LOL!  I do spend Thanksgiving with family, but the parents generally head to Florida (or some other place that's much warmer than Illinois) at the end of October so we aren't together.  So this year Mom decided we'd just have Thanksgiving dinner a little early.  And we did. 

I'm not a fan of pumpkin or pecan pie but my Mom's Pumpkin Roll hits the spot.

Carol's Pumpkin Cake Roll
Cake:
3 large eggs
1 cup sugar
1/2 15oz can pumpkin puree
3/4 cup flour
1 teaspoon baking powder
2 teaspoon cinnamon
1 teaspoon ginger
1/2 teaspoon nutmeg
1/2 teaspoon salt
1 cup chopped pecans
powdered sugar

Filling:
1 cup powdered sugar
8oz. softened cream cheese
4 Tablespoons unsalted butter
1/2 Teaspoon vanilla


The ingredients.  I made two logs so that's why you see 6 eggs.  And I forgot the salt.  And, although it's too small to see in this photo, one of the spice jars is cloves instead of nutmeg.  Use nutmeg. 


Let's get started.  Line two jelly roll pans with parchment paper.  Grease the paper and dust with powdered sugar.
 
Next step.  Beat 3 eggs for 5 minutes.  The time passes quicker than you'd think.
 
 
Gradually beat in the sugar and then the pumpkin puree.  Add flour, baking powder, spices and salt and mix it all together.
 
 
Next step.  Spread the batter in the prepared pan and sprinkle with the pecan pieces.  Bake for 15 minutes at 375 degrees.


And then.  Here's the fun, yet scary part.  Spread a clean kitchen towel out on the counter and sprinkle with powdered sugar.  Turn the pan upside down onto the towel.  Yes, there will be a cloud of powdered sugar in the air.  Yes, do it quickly.  Yes, holding your breath helps with both the powdered sugar fog and your nerves that you might miss the towel.  Or the counter.  Or that it'll slide out before you can get it flipped over.  Or maybe that's just my fear.  Whew, made it.  Slowly peel the parchment paper from the cake. 

 
And now to add the roll.  Loosely roll the cake with the towel.  There isn't an easy way to explain this so just check out the above picture.  You want the cake to cool in the rolled shape but you need to be able to unroll it once it cools to add the cream cheese filling.  Without the towel, the rolls would stick together. 

 
Let the rolled up cake cool for 20 minutes.
 
 
Final step.  Combine all the filling ingredients in a bowl and beat until smooth.  Unroll the cake, spread the filling over the cake and roll it back up (without the towel!).  Sprinkle powdered sugar before serving. 


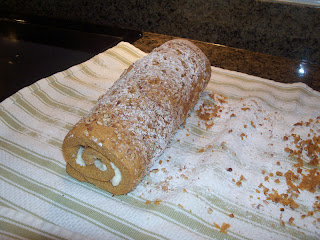
Taste test.  Love.  Happiness.  Giving Thanks. 

Enjoy
-Teddra