Friday, August 10, 2012
Design Principals Tags 1 & 2
Hello! It's FRIDAY!! I'm getting caught up on a few things that I've started but not completed for one reason or another. I have two lessons from the Design Principals online class I'm taking, two or three scrapbook layouts that need some final touches, a mini album from Papertrey Ink's Stamp A Faire and about five weeks of Project Life to work on this weekend.
I did manage to complete the tags for the first two Design Principals lessons, just not the cards.
Well, that's it for today. Now I'm off to work on everything else!
Have a great weekend!
-Teddra
Wednesday, August 8, 2012
Orangebursts
Hello and Welcome to Adventures In Baking! Let me just begin by saying you NEED to bake these cookies right now! Finish reading this post, print out the recipe, go to the store and get to baking. You'll wonder how you ever lived without this cookie in your life. They're that good. They may not be that beautiful to look at (I blame the zest for giving them a splotchy look), but man do they taste wonderful!
I was searching around the web and through the few cookbooks that I own for ideas on what to bake this week. There are so many options out there, it helps me to begin my search with a specific element and go forward from there. Sometimes my search element is the type of item I have in mind, such as a cookie or cupcake and other times it's with a specific flavor profile or ingredient. With the heat we've had this summer, I wanted something light and fruity so I began searching for recipes utilizing peaches or oranges. I figured I'd find a tart or a pie recipe that tickled my taste buds, and I sure didn't think I'd run into a cookie recipe. And then I found the recipe for Orangbursts from Baked Perfection. The write-up said they reminded the baker of Orange Creamsicle Ice Cream. Oh yeah. This will work nicely.
Orangebursts
recipe slightly adapted from Baked Perfection
2 1/2 cups all purpose flour
3/4 teaspoon baking soda
1/2 teaspoon salt
1 cup (2 sticks) butter, softened
1/2 cup sugar
1/2 cup firmly packed brown sugar
1 large egg
1 teaspoon vanilla extract
1 teaspoon orange extract
2 cups vanilla chips
zest of two oranges
Preheat oven to 375 degrees Fahrenheit.
Let's get started. In a small bowl, combine flour, baking soda, and salt; set aside. In a large bowl, cream butter and sugars until light and creamy. Beat in egg, vanilla extract and orange extract until smooth. Gradually add flour mixture until combined. Stir in orange zest. Oranges are so much easier to zest than lemons.
Next step. Stir in vanilla chips. I used Ghirardelli Classic White for my baking chips. Can't go wrong with Ghirardelli.
Final step. Drop rounded teaspoonfuls onto cookie sheet. Bake 8-10 minutes or until golden brown around the edges. Cool for several minutes before transferring to rack to cool completely. Instead of using a Silpat, I used parchment paper to line my baking pans. Super easy cleanup.
The taste test. Ummmmm, yeah. I think I gave you a clue as to whether or not I liked these in the first paragraph! They're a definite favorite already. Share them with everyone you know. But be sure to keep a few for yourself!
The clean up. The recipe made 34 cookies. I have 2 left. Some went into the freezer (cause I know my Dad's gonna love these) and some went to a friend as a thank you for helping me out this week. And I may have eaten one or two. Or more.
Thanks for stopping by and enjoying my Adventure! See ya next week.
-Teddra
Monday, August 6, 2012
1st Day of School
Hello and Happy Monday! Well, after a looooong break, I dug into my childhood photos and started working on a layout. I think the last layouts I made were of my brother's wedding this past April, so it's been a while.
I used patterned papers and embellishments from Little Yellow Bicycle's Hello Fall! line. Although the first day of kindergarten was in September, it's usually still pretty warm. So even though I'm wearing a tank top and shorts in the pics, a new school year says warm colors and falling leaves to me.
Thanks for stopping by
-Teddra
Wednesday, August 1, 2012
Cinnamon Cream Cheese Coffee Cake
The ingredients. This is one of the most involved recipes I've attempted in quite a while. Lots of ingredients, lots of utensils used, lots of prep work.
Let's get started. The crumb layer. Combine all the crumb ingredients in a small bowl. Mix with a fork until mixture resembles crumbles. Set aside.
Butter, flour, brown sugar, cinnamon, pecans and salt.... All things that make a good topping. And there you have the crumb layer.
Next step. The cream cheese layer. Beat cream cheese and brown sugar until fluffy. Mix in vanilla and cinnamon. Stir in pecans. Set aside.
This would be the cream cheese layer.
Final step. The coffee cake layer. Whisk together flour, baking powder, baking soda and salt. Set aside.
Beat butter and sugar until fluffy. Add eggs, one at a time, beating just until combined after each addition. Mix in vanilla.
For those keeping track, this is bowl number four of ingredients. Four bowl and my limited counter space. Add in a hand mixer and a pile of measuring utensils and I'm all out of room.
Gradually add dry ingredients. Stir in sour cream and mix just until combined.
Transfer batter to prepared pan. Top batter with spoonfuls of cream cheese swirl. Use a knife to swirl. There isn't a lot of color contrast between the batter and cream cheese layer so it's a little difficult to see the swirl, but it's there.
Sprinkle crumb mixture evenly over top of cake.
Taste test. This is really, really good! Nice texture, moist and springy to the touch. I could use a little more crumb topping to cake ratio, but definitely a winner! With all the butter and cinnamon you know it smells fabulous.
The clean up. The recipe said to use a 9x13 baking dish. I used the largest one I have. And it's full! This would be nice to make for a special occasion such as a holiday brunch or a treat to take to work. You could easily get 24 pieces out of this cake. Or you could just hand everyone a fork and tell them to dig in!
On the next episode of Adventures In Baking, I'm thinking I want to try a flavor I haven't worked with yet. Maybe orange or peach?
See ya next time
-Teddra
Tuesday, July 31, 2012
Design Principals
Hello! How's your week going so far? Do you have Olympic fever yet? I spent a great deal of time over the weekend watching a variety of sports that are only available every four years as well as my daily St Louis Cardinals baseball game.
I do have a little something new to share with you tho. I signed up for an on-line class to learn a little more about design principals. The class is five and a half weeks long and is taught by Britta Swiderski. You can learn all about it by clicking right HERE.
This is the tag I made from the introduction.
In addition to the individual projects for each lesson, we're making a tag book focusing on the teaching elements that each lesson is built around. I used inks in blues, greens and purples for the background and some new orange Washi tape.

The first full lesson was posted yesterday so I'm off to check out the videos and get inspired!
See ya tomorrow!
-Teddra
I do have a little something new to share with you tho. I signed up for an on-line class to learn a little more about design principals. The class is five and a half weeks long and is taught by Britta Swiderski. You can learn all about it by clicking right HERE.
This is the tag I made from the introduction.
In addition to the individual projects for each lesson, we're making a tag book focusing on the teaching elements that each lesson is built around. I used inks in blues, greens and purples for the background and some new orange Washi tape.
The first full lesson was posted yesterday so I'm off to check out the videos and get inspired!
See ya tomorrow!
-Teddra
Saturday, July 28, 2012
The Best of the Rest
Hi and welcome to the final entry of 'The Best Of' series from Adventures In Baking. This category features all the remaining recipes .... the candy, bars, brownies and miscellaneous items that don't really fit into any category. This is the kitchen sink of recipes if you will. There are 9 contenders in this category and there's such a variety, it's difficult to rank them against each other.
Picking the top two is a breeze, they're the Raspberry Shortbread Bars I made in March and the Strawberry Jello Pretzel Squares I made in May.
I made the Shortbread Bars again in April using Strawberry jam instead of Raspberry. My parents scarfed them up, LOL! They're very rich and buttery, but oh so yummy. You can read all about the bars by clicking here.
The Strawberry Jello Pretzel Bars were so good, I didn't even take the time to take a good photo! Just thinking about the sweet and salty goodness of this dessert makes me want to make it again! You can read all about this one right here.
Next up we have the desserts that, while they might not have been favorites of mine, they earned top reviews from my taste testers: Cookie Dough Truffles, Chocolate Covered Pretzel Peanut Butter Bites (longest name ever, lol) and Banana Pudding.
Picking the top two is a breeze, they're the Raspberry Shortbread Bars I made in March and the Strawberry Jello Pretzel Squares I made in May.
I made the Shortbread Bars again in April using Strawberry jam instead of Raspberry. My parents scarfed them up, LOL! They're very rich and buttery, but oh so yummy. You can read all about the bars by clicking here.
The Strawberry Jello Pretzel Bars were so good, I didn't even take the time to take a good photo! Just thinking about the sweet and salty goodness of this dessert makes me want to make it again! You can read all about this one right here.
Next up we have the desserts that, while they might not have been favorites of mine, they earned top reviews from my taste testers: Cookie Dough Truffles, Chocolate Covered Pretzel Peanut Butter Bites (longest name ever, lol) and Banana Pudding.
I made the Cookie Dough Truffles in February, just before Valentine's Day. It was fun to play with the chocolate melts and mix up the colors, but the truffles are way too sweet for me. My taste testers took these home with them. You can read all about these little beauties here.
The Chocolate Covered Pretzel Peanut Butter Bites were a hit as well. It's a good thing the recipe made such a huge amount of bites so they could be shared. Everyone that tried them took a dozen, or two, home with them. If I had to choose one to make again, it would be the white chocolate. The coating wasn't as heavy as the other colors. Click here to see how I made them.
And then we have the Banana Pudding I made for Father's Day in June. This is the one Adventure I didn't fully embrace. I enjoyed the process of making pudding from scratch and whipping the meringue, but I just couldn't bring myself to taste it. But I have it on good authority, from two seasoned banana pudding aficionados, that it was superb. Read all about the process here.
And that leaves us with Red Velvet Swirl Brownies, Candy Bars, Brownies and Raspberry Pecan Blondie's. I learned something from each of these recipes but I just didn't like any of them enough to try again.
What did I learn from the Red Velvet Swirl Brownies? I learned I like my brownies with some chocolate! Although the swirl was kinda awesome. Check out my Swirl Adventure here.
And here's the Candy Bar. Loved the bottom oat layer. All the chocolate, peanut and butterscotch on top, not so much. It was just too much of a good thing. And there wasn't really any baking involved. And I swear the pan weighed 50lbs. Check out everything that's poured into the bars here.
The Chocolate Chip Brownie recipe was a mixed bag for me. The brownies were terrible but the chocolate chip cookies made with the leftover bottom layer were excellent. If you're looking for a good chocolate chip recipe go here.
And that brings up to the final Adventure in the review, Raspberry Pecan Blondie's. I had high hopes for these but was disappointed. They didn't bake evenly and the raspberries were pretty, but didn't add much flavor. One final link for ya, here, and that wraps up The Best of the Rest.
I'm four recipes into the second half of the year and I've already had some hits and some misses. But the Adventure must continue!
Here's a little sneak peak at the next episode..... enjoy!
Till next time
-Teddra
Wednesday, July 25, 2012
Toffee Squares
Hello! Welcome to Adventures In Baking. This week's adventure started with this recipe right here. I was reading through a few of my daily blog rolls and the photo of the squares just called out to me. With all the cookies I've been making lately, it was definitely time to go in a different direction.
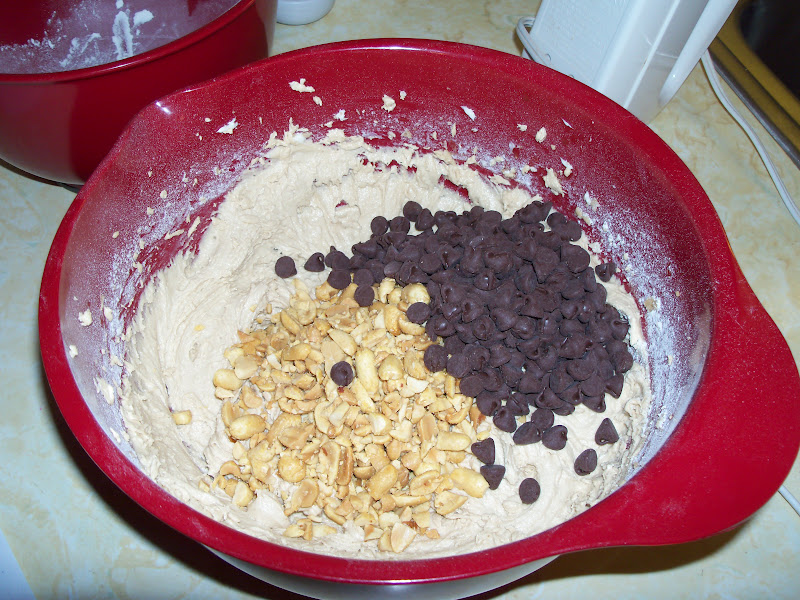
The ingredients. All ya gotta do is look at the recipe and know these squares are gonna be loaded! Peanuts, chocolate chips, pecans, butterscotch chips and coconut.
Let's get started. Whisk together flour, baking soda and salt. Set aside. It said whisk. I used a spoon. I have a whisk. It was about two steps away. The spoon was one step away. It was 10pm at night after a long day at work. I grabbed the spoon.
Next step. Beat butter until light and fluffy. Add brown sugar and continue beating until creamy. Add eggs, one at a time, mixing well after each addition. Mix in vanilla. So far it's pretty much the same as any basic cookie recipe.
Final step. Gradually add flour mixture, mixing until almost blended. Stir in peanuts and chocolate chips. Yep, still a cookie recipe. Transfer dough to pan and spread evenly. Sprinkle top with remaining chocolate chips, butterscotch chips, pecans and coconut.
Taste test. This is the Adventure part of Adventures In Baking. They taste like a chocolate chip cookie with stuff on top. They're ...... OK. Nothing special. And with all those toppings I expected this to be special. And why are they called toffee squares? Where's the toffee? Yes, Aunt Shari, you could leave off the coconut. The butterscotch chips smell divine. I may have to look for a few more butterscotch recipes just so I can smell them again! Would I make them again? Probably not. They have the potential to be great, they just didn't work for me.
The clean up. The recipe said to use a 9-inch square baking pan. I have an 8-inch pan, but not a 9-inch one. I learned my lesson early in this adventure that a smaller pan is not substitutable unless you want a hot mess. So I used a 7x11 pan. 9 inches square = 7x11. Right? 18 inches total either way. Anyway, that's what I did. After the directed 35 minutes, the center was still visibly jiggly. After 20 additional minutes, it wasn't quite as jiggly, but I was worried about the sides and bottom being burned. I cut around the middle and the edge pieces are pretty good. When I had this 'not fully baked in the middle' problem before with both brownie recipes, I thought the problem might have been the pan I was using. I generally use Longaberger pottery. It's oven safe and cleans up very well. But even when I used my clear Pyrex dish for one of the brownie recipes I had the same problem. Maybe it's just the oven. It's kinda old. Wilma Flintstone was it's original owner.
Next week, I'm trying to stay away from the cookies again and I think I've found a winning recipe.
Stop back next Wednesday evening to check it out!
-Teddra
Subscribe to:
Posts (Atom)