Wednesday, August 22, 2012

Double Chocolate Peanut Butter Cupcakes


Hello and welcome to Adventures In Baking!  I was in the mood for Chocolate.  This is what I found.  Double Chocolate Peanut Butter Cupcakes.  Um, Yeah.  I purchased a cupcake cookbook by Betty Crocker.  It's called The Big Book Of Cupcakes.  Original.  Click here to go to the Amazon line if you want to check it out.  I bought mine at Sam's.  There's probably close to 200 cupcake recipes in the book.  I'm thinking about making 2013 the year of the cupcake.  Maybe cupcake and cookies.  Maybe vegetables.  Maybe not.  

 
The ingredients.  Not too many.  Pretty basic.  No butter.  I had everything except for the sour cream on hand. 
 
 
Let's get started.  In a large bowl beat granulated sugar, peanut butter, sour cream, egg and egg white.  As I was adding the ingredients to the bowl I realized I actually needed two eggs.  One whole egg and just the egg white of the second egg.  Just as it says in the directions.  I know when I first looked over the recipe I saw that it said 1 egg and 1 egg white and I thought it was another one of those very specific instructions like scrape the sides of the bowl......use the egg and the egg white.  In my mind, the egg was the yolk only.  Luckily, I realized it meant 1 yolk and 2 egg whites before I got too far along.  I keep thinking one of these days I won't make these blunders, or start to make the blunders, but I guess this way it will always be an Adventure with me!

 
Next step.  Beat in the flour, baking cocoa, hot water and baking soda.  Stir in chocolate chips. 


Final step.  Divide batter evenly among baking cups. 
 
 
As I was filling the baking cups I was thinking about the recipe and wondering why it was called DOUBLE chocolate.  Oh yeah, cocoa and chocolate chips.  Chocolate chips?  Whoops.  There, off to the side of the counter, sat my lonely bag of mini chocolate chips.  Propped up against the toaster.  Waiting to be useful. 
 
 
I'll just sprinkle them on top.  Maybe they'll sink into the middle a bit.  Now they're double chocolate.
 
 
Taste test.  Well, as you can clearly see, they didn't sink.  I was a little worried they would be too chocolate-y for me, but the peanut butter shares the stage with this cupcake.  The recipe said to sprinkle confectioners sugar on top but I have a problem with loose powdered sugar on top of things such as donuts.  As hard as I try not to, I inevitably end up taking a breath at just the wrong time and getting a big whiff of powdered sugar up my nose.  Which causes a coughing, snorting, runny eye mess.  Not the best way to enjoy a cupcake.  So no confectioners sugar for me. 
 
  
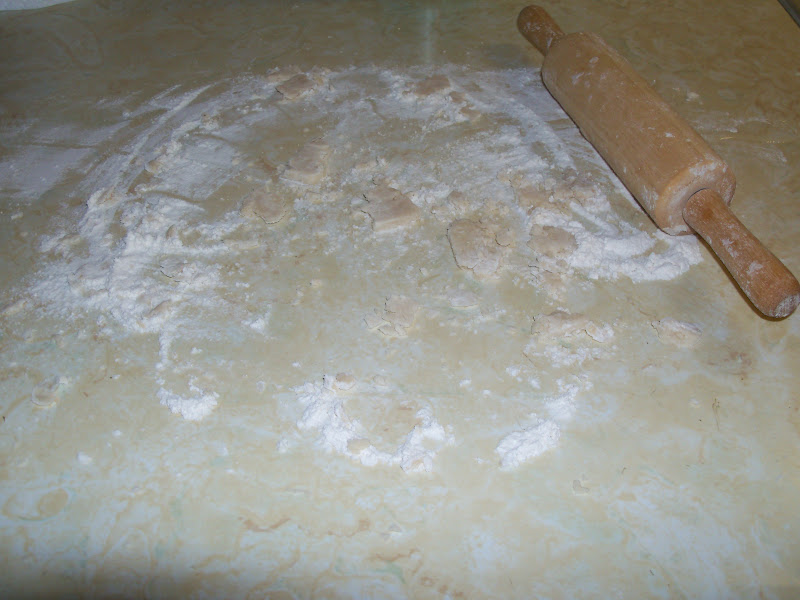
The clean up.  The recipe yields 12 cupcakes.  A manageable number.  I think they would have been better with the chocolate chips throughout the cupcake, but these are still a winner in my book.
 
Enjoy
-Teddra


Tuesday, August 21, 2012

Boo Crew


Hello and Happy Tuesday!  Is your week off to a good start?  I know it's only two days into the week, but mine is flying by!  I barely made it two blocks from my house yesterday morning before being stopped by a school bus.  Yep, school's back in session.  But that just means Fall is right around the corner and I looooove the cooler weather, warm sweaters, apples and pumpkins and all things Fall.  Today's layout is all about getting me in the Fall frame of mind and one big fall event is Halloween. 

These cuties are my brother's dogs.  This is Apollo on the left and Alana on the right.  Now, I'm one of those people that think dressing your dog in clothes is nuts, but this was a special occasion.  They were desssed up to greet trick-or-treaters for Halloween last year.  Apollo is dressed as a baseball player and Alana is the cheerleader.  They were still puppies last year (80 lb puppies!) so I'm not sure how long the costumes stayed on, but they're pretty cute!


The patterned papers are are Happy Days by My Mind's Eye and I used a little bit of solid washi tape for added color.

Check back tomorrow for my next Adventure In Baking!
-Teddra

Wednesday, August 15, 2012

Strawberry Shortcake

Hello and welcome to another episode of Adventures In Baking.  For this week, I had planned for Lemon Pound Cake.  I was having my wisdom teeth removed a few days before baking day so I figured I'd want something soft (assuming I didn't burn it).  I had all the ingredients ready to go.  And then I went to Sam's Club.  And purchased 2 lbs of Strawberries.  Goodbye Lemon Pound Cake, Hello Strawberry Shortcake.


Strawberry Shortcake is a sensitive subject.  It means different things to different people.  And people are very particular about their strawberry shortcake.  To some, it means Angel Food cake with strawberries on top.  To others it means yellow sponge cake bowls the color of Twinkies with strawberries in the center.  To my childhood horror, my Grandmother presented my brother and I with a bowl of saltine crackers topped with strawberries and called it strawberry shortcake one summer long, long ago.  To me, strawberry shortcake means light, flaky pie crust pieces topped with juicy, slightly smashed, strawberries on top.  Like I said earlier, it's a personal thing.  And it pretty much comes down to how you remember it from childhood.

    
The ingredients.  There aren't very  many.  And I was so excited, I forgot to take a picture.  You need strawberries, sugar, flour, salt, Crisco and cold water.  Doesn't sound so good right now, but just wait for the magic.


Let's get started.  First, fill a glass with 1/2 cup water.  Place the glass in the freezer.  Just trust me.  Next, wash, hull and slice a bunch of strawberries.


Next step.  Pour on the sugar.  The amount of sugar is up to you.  The sugar pulls the juice out of the berries.  The more sugar you use, the more juice you get.  Give it a stir and set it to the side to do it's thing.  I used 1 cup of sugar for 2 lbs of berries.  If you aren't sure how much to use, you can always start small and add more a little at a time.


Final step.  The crust.  In a bowl, add 1 cup of flour for every 1/3 cup of Crisco.  I used 2 cups flour and 2/3 cup Crisco.  Add a  little salt.  Using your hands, combine the ingredients together until little crumbs form.  Now, grab that glass of water out of the freezer.  Add the cold water, a tablespoon at a time, until the dough is moist.  I used two tablespoons of cold water.  


With minimal handling, pat the dough into a ball.  Spread flour onto your work surface and roll the dough to about 1/4 inch thick.  Using a fork, poke holes in the dough.  Then, cut the dough into whatever shapes you want.  I generally just cut it into squares or rectangles.  My mom does circles.  You could use shape cookie cutter you'd like.  Place the shapes onto an ungreased cookie sheet and bake at 375 degrees for 10-15 minutes.  Baking time will vary depending on the thickness of the pieces so check on the progress and remove when the crust starts to turn golden. 


Taste test. In a bowl or mug or whatever kind of container you can find, layer a few pieces of crust and top that with the strawberries. Don't forget to add a couple spoonfuls of the juice. The crust soaks up the juice and combines for a spoonful of wonderful.


The clean up.  If you were to ask people what one food says 'Summer' to them, you'd probably get a variety of answers.  For me, that one food is Strawberry Shortcake.  What's your answer?

Have a great week!
-Teddra  


Monday, August 13, 2012

Mothers Day


Hello and Happy Monday!  I'm back at work this week after a couple of days off at the end of last week.  Let's hope the week goes smoothly (and quickly!).


I've really been trying to use the papers and embellishments that I have instead of hoarding them for 'the future'.  Whenever that is.  I used patterned papers by We R Memory Keepers Good Day Sunshine line.  The papers are light, soft colors so I used the navy blue block for a pop of color.  The photos were taken on Mother's Day weekend.  We grilled shrimp, scallops and fish and I made Strawberry cupcakes with lemon frosting.

Have a great week!
-Teddra

Friday, August 10, 2012

Design Principals Tags 1 & 2


Hello!  It's FRIDAY!!  I'm getting caught up on a few things that I've started but not completed for one reason or another.  I have two lessons from the Design Principals online class I'm taking, two or three scrapbook layouts that need some final touches, a mini album from Papertrey Ink's Stamp A Faire and about five weeks of Project Life to work on this weekend. 

I did manage to complete the tags for the first two Design Principals lessons, just not the cards. 

Well, that's it for today.  Now I'm off to work on everything else!

Have a great weekend!
-Teddra

Wednesday, August 8, 2012

Orangebursts


Hello and Welcome to Adventures In Baking!  Let me just begin by saying you NEED to bake these cookies right now!  Finish reading this post, print out the recipe, go to the store and get to baking.  You'll wonder how you ever lived without this cookie in your life.  They're that good.  They may not be that beautiful to look at (I blame the zest for giving them a splotchy look), but man do they taste wonderful! 

I was searching around the web and through the few cookbooks that I own for ideas on what to bake this week.  There are so many options out there, it helps me to begin my search with a specific element and go forward from there.  Sometimes my search element is the type of item I have in mind, such as a cookie or cupcake and other times it's with a specific flavor profile or ingredient.  With the heat we've had this summer, I wanted something light and fruity so I began searching for recipes utilizing peaches or oranges.  I figured I'd find a tart or a pie recipe that tickled my taste buds, and I sure didn't think I'd run into a cookie recipe.  And then I found the recipe for Orangbursts from Baked Perfection.  The write-up said they reminded the baker of Orange Creamsicle Ice Cream.  Oh yeah.  This will work nicely.


Orangebursts
recipe slightly adapted from Baked Perfection

2 1/2 cups all purpose flour
3/4 teaspoon baking soda
1/2 teaspoon salt
1 cup (2 sticks) butter, softened
1/2 cup sugar
1/2 cup firmly packed brown sugar
1 large egg
1 teaspoon vanilla extract
1 teaspoon orange extract
2 cups vanilla chips
zest of two oranges

Preheat oven to 375 degrees Fahrenheit.


Let's get started.  In a small bowl, combine flour, baking soda, and salt; set aside.  In a large bowl, cream butter and sugars until light and creamy.  Beat in egg, vanilla extract and orange extract until smooth.  Gradually add flour mixture until combined.  Stir in orange zest.  Oranges are so much easier to zest than lemons. 

 
Next step.  Stir in vanilla chips.  I used Ghirardelli Classic White for my baking chips.  Can't go wrong with Ghirardelli.


Final step.  Drop rounded teaspoonfuls onto cookie sheet.  Bake 8-10 minutes or until golden brown around the edges.  Cool for several minutes before transferring to rack to cool completely.  Instead of using a Silpat, I used parchment paper to line my baking pans.  Super easy cleanup.


The taste test.  Ummmmm, yeah.  I think I gave you a clue as to whether or not I liked these in the first paragraph!  They're a definite favorite already.  Share them with everyone you know.  But be sure to keep a few for yourself! 


The clean up.  The recipe made 34 cookies.  I have 2 left.  Some went into the freezer (cause I know my Dad's gonna love these) and some went to a friend as a thank you for helping me out this week.  And I may have eaten one or two.  Or more. 

Thanks for stopping by and enjoying my Adventure!  See ya next week.
-Teddra


Monday, August 6, 2012

1st Day of School


Hello and Happy Monday!  Well, after a looooong break, I dug into my childhood photos and started working on a layout.  I think the last layouts I made were of my brother's wedding this past April, so it's been a while. 

I used patterned papers and embellishments from Little Yellow Bicycle's Hello Fall! line.  Although the first day of kindergarten was in September, it's usually still pretty warm.  So even though I'm wearing a tank top and shorts in the pics, a new school year says warm colors and falling leaves to me. 


Thanks for stopping by
-Teddra

Wednesday, August 1, 2012

Cinnamon Cream Cheese Coffee Cake


Hello and Happy Wednesday!  Welcome to the latest episode of Adventures In Baking.  So I wanted to step away from all the cookies I've been making and try something a little more traditional.  I found this recipe for Coffee Cake at Bake or Break and you can find the full recipe here.  Now, I'm not a coffee drinker.  I have no desire to smell it either.  Blech.  When I was in college, I worked at a shoe store in the local mall.  To get to the shoe store each day, I had to pass a Gloria Jean's coffee shop.  Twice a day, four times if I left the store for lunch or break, I had to walk past the place.  I'd walk clear on the other side of the hallway, against the flow of traffic, and hope there weren't people blocking the way so I could make it through without having to take a breath.  And the aroma wasn't just right in front of the store, oh no, it had to contaminate all the air in the vicinity of the place.   Nope, coffee is not for me.  But this cake sure hits the spot......

The ingredients.  This is one of the most involved recipes I've attempted in quite a while.  Lots of ingredients, lots of utensils used, lots of prep work. 

Let's get started.  The crumb layer.  Combine all the crumb ingredients in a small bowl.  Mix with a fork until mixture resembles crumbles.  Set aside. 
Butter, flour, brown sugar, cinnamon, pecans and salt.... All things that make a good topping.  And there you have the crumb layer. 
Next step.  The cream cheese layer.  Beat cream cheese and brown sugar until fluffy.  Mix in vanilla and cinnamon.  Stir in pecans.  Set aside.
  This would be the cream cheese layer.
Final step.  The coffee cake layer.  Whisk together flour, baking powder, baking soda and salt.  Set aside.
Beat butter and sugar until fluffy.  Add eggs, one at a time, beating just until combined after each addition.  Mix in vanilla.
For those keeping track, this is bowl number four of ingredients.  Four bowl and my limited counter space.  Add in a hand mixer and a pile of measuring utensils and I'm all out of room.
Gradually add dry ingredients.  Stir in sour cream and mix just until combined.
Transfer batter to prepared pan.  Top batter with spoonfuls of cream cheese swirl.  Use a knife to swirl.  There isn't a lot of color contrast between the batter and cream cheese layer so it's a little difficult to see the swirl, but it's there.


Sprinkle crumb mixture evenly over top of cake.


Taste test.  This is really, really good!  Nice texture, moist and springy to the touch.  I could use a little more crumb topping to cake ratio, but definitely a winner!  With all the butter and cinnamon you know it smells fabulous. 


The clean up.  The recipe said to use a 9x13 baking dish.  I used the largest one I have.  And it's full!  This would be nice to make for a special occasion such as a holiday brunch or a treat to take to work.  You could easily get 24 pieces out of this cake.  Or you could just hand everyone a fork and tell them to dig in!

On the next episode of Adventures In Baking, I'm thinking I want to try a flavor I haven't worked with yet.  Maybe orange or peach? 

See ya next time
-Teddra