Wednesday, September 26, 2012

Sunshine Muffins


Good Afternoon and welcome to Adventures In Baking!  I think baking has taken over my crafty blog for the time being.  I have a couple of scrappy projects started and ideas for things I want to accomplish but nothing much seems to be getting done around here lately.  I need more hours in the weekends!

The muffins I'm sharing today are from the recipe book The Chocolate Snowball.  Which is an odd choice as there isn't a drop of chocolate in the muffins.  My aunt sold me on the muffins by telling me they're similar to carrot cake.  I don't know that I'd equate them to carrot cake (duh, no frosting!), but they may have surpassed blueberry as my favorite muffin. 

 
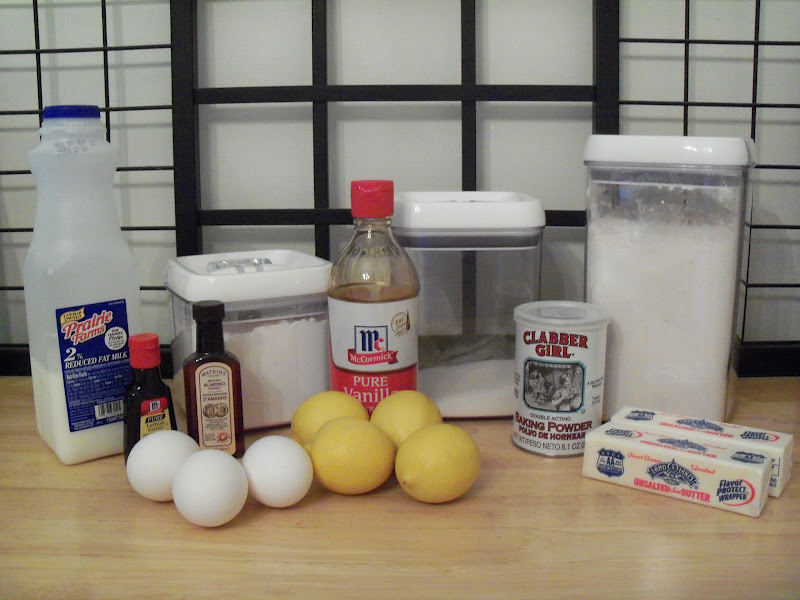
The ingredients.  The recipe called for dark raisins but I used golden raisins.  
 
 
Let's get started.  Whisk eggs, oil, vanilla and raisins together. 
 
 
Next step.  Stir in carrots, apples and sunflower seeds.  Grated carrots and apples.  Just so ya know, grating apples is a messy business.  
 
 
Final step.  Sift flour, sugar, baking soda, cinnamon and salt into a bowl and then mix into the carrot mixture.  Divide into prepared muffin tins and sprinkle with sunflower seeds.
 
 
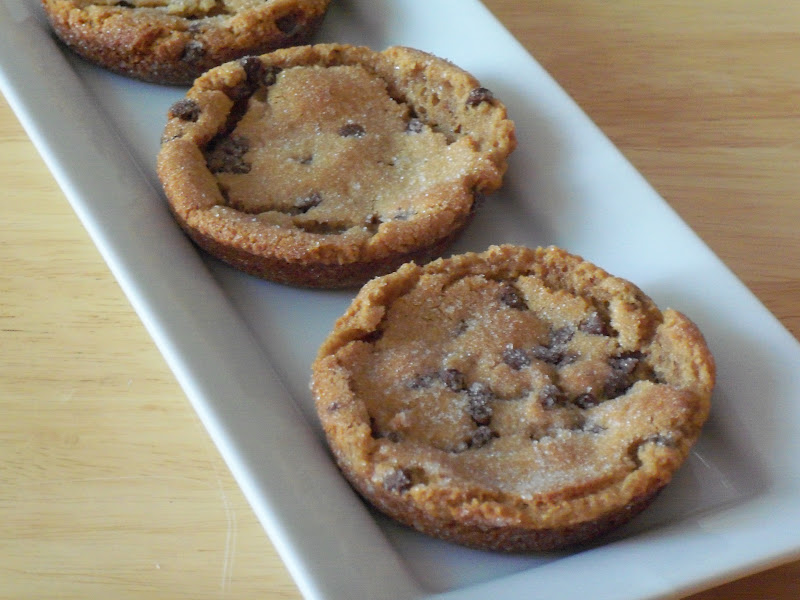
Taste test.  Like I said, may be my new favorite.  I used salted sunflower seeds and it's a perfect balance of sweet (from the apples and raisins) and salty. 
 
The clean up.  The recipe makes 12 large muffins.  I sprayed and floured my muffin pan because the directions said to fill the wells almost completely full to produce the largest muffin top possible.  They rose up, but didn't overflow at all. 
 
I liked these so much I wasn't going to share with anyone, haha.  But then we had a last minute work thing so I took a few to spread the sunshine!
 
On the next episode of Adventures In Baking.......Since September seems to have been the month of the apple, it's only fitting that October be the month of ....... Halloween candy!  I found some cute recipes I can't wait to try out. 
 
See you next week
-Teddra 
 

Wednesday, September 19, 2012

Apple Cream Cheese Bundt Cake

Hello and welcome to Adventures In Baking!  This weeks baked good definitely falls into the Adventure side of baking.  I generally start these posts with an enticing photo of the item in question.  This week however, I didn't want to scare you right at the start, so here's a warning before we get to the pictures:  This is one ugly cake!  Not in a 'so ugly it's cute' kinda way either.  It's just demoralizing to look at.  Once you stop laughing.  Take a look for yourself.


Photos don't really do it justice.  I should have taken one straight on at eye level so you could see how lumpy it is.  If you want to see a beautiful photo of the cake I was attempting to make go here.  Her cake is so pretty.  I had such high hopes. 


The ingredients.  Lots and lots of ingredients.  Surprisingly I had everything on hand except the apples and cream cheese. 


Let's get started.  First we're going to make the cream cheese filling.  Beat the cream cheese, butter and sugar until well combined and smooth.  Add the egg, flour, and vanilla and continue beating just until incorporated.  Set aside.


Next step.  In a large bowl, whisk the flour, both sugars, cinnamon, salt, baking soda, nutmeg and allspice together.  Add the eggs, oil, applesauce and vanilla and mix just until combined.
 
 
Fold in the pecans and chopped apples.
 
 
Final step.  Spoon about 2/3 of the cake batter into the prepared pan.  Top evenly with the cream cheese layer, leaving a border around the edge of the pan.  Top the filling with the remaining cake batter.  Bake.


The frosting.  Combine the brown sugar, butter and milk in a saucepan.  Set over medium heat and bring to a boil, whisking constantly.  Boil for 1 minute, whisking constantly.  Remove the pan from the heat and stir in the vanilla.

 
Whisk in the confectioners sugar a little at a time until it's completely incorporated and the frosting is smooth.  Gently stir until it starts to thicken then pour it over the cooled cake. 

 
Taste test.  It tastes amazing.  It looks ...... like I tried to glue it back together, lol!  Although I sprayed the bundt pan and let the cake cool before trying to extract it from the pan, let's just say it didn't go so well.  Part of the problem, I think, is that the cream cheese layer was too thick.  There wasn't enough cake baked around the cream cheese so when I turned the pan over to pop the cake out the bottom and the cream cheese were too heavy and separated from the top portion of the cake.  That's my story and I'm sticking to it!    Anyway, like I said, it has great flavor and the applesauce in the batter keeps it moist.   My parents both agreed the frosting was too sweet and I thought it was too thick.  But it is concealing a mess and practically holding the cake together! 
 
The clean up.  Well, since we all agree the 'cake' portion is a winner, there are a few things I'd adjust if I were to make it again.  First, just use a regular cake pan.  And even without the bundt pan, I'd drop the cream cheese layer.    It didn't taste bad or anything, but it didn't seem to really add anything to it either.  I think using a regular pan would help the frosting situation also as it would be spread out across a larger area so it wouldn't be quite so thick. 
 
That's it for this week.  Check back next week for another Adventure In Baking!
-Teddra
 

Monday, September 17, 2012

Family Traditions


Hello and welcome to Monday!  I can't believe it's the middle of September already.  The year is just flying by.  Although I make a few Christmas cards each month throughout the year, I'm really starting to get into the holiday frame of mind with all the goodies Papertrey Ink introduced this past week.  Talk about Christmas overload.  But very inspiring at the same time.


This two page layout features photos from Christmas 1976 and include a visit to see Santa, Christmas at each of my Grandparents and Christmas Morning. 

 
I used Echo Park patterned papers from the Holly Jolly line.
 
 
So bright and cheerful!
 
Have a great week!
-Teddra

Wednesday, September 12, 2012

Caramel Apple Crisp


Hello and welcome to a delicious episode of Adventures In Baking.  Caramel Apple Crisp,um, yum.  I had a difficult time deciding what to bake this week.  I had lots of recipes printed, cookbooks to browse through and websites to peruse but nothing was calling out to me.  I generally have a recipe ready a week ahead of time so I can do my shopping and then bake on Saturday morning.  Saturday morning came and went.  So did Saturday afternoon.  At 9pm Saturday night I was at the grocery store picking up a few ingredients.  Today's glorious concoction is brought to you by Taste of Home.  You can find the recipe right here.  Check it out.  You can thank me later, lol!


The ingredients.  The recipe said to use tart apples so I went with Granny Smith's, my favorite.  And for the caramel, I used these Caramel Bits I found in the baking aisle.  Little round bits of chewy caramel heaven.  Without the individual wrappers.


Let's get started.  In a large bowl combine the oats, flour, brown sugar and cinnamon. 


Cut in the butter until it's crumbly. 


Next step.  Press half the mixture into a greased 13 x 9 inch baking dish. 


Layer with half the apples, caramels and 1 cup of oat mixture.  Out of the 6 apples I peeled, I only ended up using 4 and a half.


Final step.  Repeat the layers and pour a half cup of apple cider over the top.  Bake for 30 minutes, drizzle the remaining cider on top and bake for 20 more minutes. 


Taste test.  We are all in agreement.  Love.  Sooooo good.  Maybe not the most enticing photo, but I can assure you I was scraping the sides of the bowl.  I have it on good authority that it's even better when served warm and with a side (or two) of vanilla ice cream. 

 The clean up.  This is one full dish of yummi-ness.  Of course it all depends on serving size, but there are approximately 12 servings. 

See ya next week
-Teddra


Monday, September 10, 2012

The Party Place

 Hi-Ya.  Is your week off to a good start? My week is a little unusual because I'm working out of town until Friday.  It's nice to have a change of scenery every once in a while.  It makes you appreciate what you have while also offering a glimpse into future possibilities. 


I'm still going through the hu-mongo pile of pictures my Mom gave me chronicling my life.  This layout focuses on my 5th birthday.  A new bike, a cowgirl outfit complete with toy pistols and cake.  What more could a five-year old girl want? Lol! 


The patterned papers are from October Afternoon's Farmhouse collection.
 
Have a great week!
-Teddra


Friday, September 7, 2012

Retired


Hello!  Ahhhhhhh, Friday.  Let the weekend begin!  Do you have a weekend full of places to be and things to do?  Yeah, me too.  My list of things I'd like to accomplish this weekend is a mile long but I plan on having some fun along the way.  To get the weekend started, I'm sharing a layout I recently completed.  I printed the photos over a year ago and never managed to get them onto paper. 


The layout focuses on my parent's life in Florida during the winter months.  They live in a gated community and drive around in a golf cart.  After they purchased the golf cart, they decided it needed a place to sleep at night, so they added a little 'golf cart garage'.  I find this to be slightly comical.  Only in Florida.     


The plaid patterned paper in the Dilly Dally collection totally say 'Golf' to me. 

Thanks for stopping by and enjoy your weekend!
-Teddra

Wednesday, September 5, 2012

Lemon Pound Cake


Welcome to this weeks episode of Adventures In Baking!  I started to make this pound cake a couple weeks ago but was sidetracked by 2 lbs of Strawberries!  Today's recipe can be found here.  For some reason, I always thought a pound cake used a pound of each ingredient.  Maybe this is a half-pound cake?  Maybe I don't know the weight conversions for everything (more likely :-).  I know it calls for 15 tablespoons of butter.  Not 16, which would be 2 full sticks and make sense.  Nope.  15. 

 
The ingredients.  Lots of extract.  Vanilla, Lemon and Almond.  And the smallest lemons ever.
 
 
Let's get started.  Beat milk, eggs and the extracts in a bowl and set to the side.

 
Next step.  In a large bowl, sift together flour, sugar and baking powder.  Add the lemon zest.   Add the softened butter to the flour mixture and mix on low. 
 
 
Final step. Slowly add the milk mixture, beating until combined.  Pour batter into loaf pan and bake. 

 
Time to make the icing.  Combine confectioners sugar and lemon juice.  Pierce the cake with a fork across the top.  Pour on the glaze.
 
 
Taste test.  Pretty good.  I was expecting a dense cake and while this isn't exactly light and fluffy, it's not a brick either.   I'd personally like more lemon flavor in the cake.  The glaze, however, is sufficiently lemon-y.  That may be because I tripled the amount of lemon juice the recipe indicated.  Maybe I should have dunked the cake in the glaze so all sides were covered.  Hmmmmm. 
 
I'm still searching for next weeks Adventure ...... Maybe apple?
 
Have a great week!
-Teddra
 

Monday, September 3, 2012

Peanut Butter Chocolate Chip Cookies


Hello and Happy Labor Day to those in the US.  I'm just stopping by to share a special edition of Adventures In Baking on this day that marks the end of Summer.  Tropical Storm Issac was in town all weekend bringing some much needed rain but also a big dose of high humidity.  I can't wait for the Fall weather to move in.  I've already been checking out recipes using apples, pumpkin and cinnamon.  While I'm waiting for Fall, I whipped up these Peanut Butter Chocolate Chip goodies this morning.  The recipe came from here.

 
The ingredients.  No butter.  No flour.  Odd.
 
 
Let's get started.  This recipe is very simple.  Basically just dump everything in a bowl and mix it together.
 
 
Next step.  Then stir in the chocolate.  The recipe says to use 3 oz of semi-sweet chocolate cut into course chunks but I had a partial bag of mini chocolate chips so I just used those.  The ingredients photo above also shows dark chocolate chips, but I didn't end up using those.


Final step.  Roll the dough into a ball and roll the ball in sugar.  I used my handy-dandy whoopie pie pan so they'd be 'deep-dish' style.
 
 
Taste test.  Pretty good.  Love the crispy-ness on the edges and they're chewy in the middle.  They aren't what I think of as a traditional peanut butter cookie, but I like them.  I think they need more peanut butter. 
 
The clean up.  The recipe said it yields 16 two inch cookies.  I made 12 deep dish cookies.  These would be good with a scoop of vanilla ice cream on top.  Yep, need to go try that out!
 
Enjoy!
 
-Teddra

Saturday, September 1, 2012

Peach Cobbler


Hello and Welcome!  Did you miss me this week?  I won't bore you with the deets, but it's been a rough one around here.  I think I'm ready to get back on track and that means an episode of Adventures In Baking is on the menu for today..... And maybe a special episode later in the week to make up for this tardy post.

My parents were going to be visiting over the weekend and the only response I received from my request for a baking suggestion was "something with peaches".  I have a Peach Cupcake recipe I've been holding onto for quite a while, but I just made cupcakes last week.  The thought of Peach Ice Cream was in the mix too.  In the end, I decided on Peach Cobbler.  It seemed to present the biggest challenge to me as I've never tasted one before and really only had a vague idea of what was in it.  Truthfully, I wasn't even sure what the differences were between a cobbler and a crisp.  I couldn't decide which recipe to use so I kinda winged it and combined aspects of a couple recipes.


Peach Cobbler
Ingredients:
8 tablespoons butter
1 cup all-purpose flour
2 cups sugar, divided
1 tablespoon baking powder
1/4 teaspoon salt
1 cup milk
4 cups sliced peaches
1 tablespoon lemon juice
1 tablespoon ground cinnamon

 
Let's get started.  Melt the butter in a 9 x 13 baking dish.  While the butter's melting, cut and slice your peaches.  I didn't peel mine, but feel free to do so. 
 
 
Next step. Combine flour, 1 cup of sugar, baking powder, salt and milk in a bowl. Stir just until the dry ingredients are moist. Pour the batter over the butter. DO NOT stir. Just pour. ( I know it sound weird and I had to fight the urge to stir, but this seems to be an integral part of the cobbler so just go with it.)
 
 
Final step.  Bring the remaining 1 cup sugar, peach slices and lemon juice to a boil over high heat. 
 
 
Pour the peaches over the batter.  Again, don't stir!  Sprinkle cinnamon over the top.  Bake at 375 degrees for 45 minutes. 
 
 
Taste test.  Well, as I said before, I don't have anything to compare it to, but I thought it was OK.  It's just not my thing.  My parents seemed to like it.  My dad thought it needed more crust (but he went back for seconds).  I would have liked it better as a crisp without any crust at all.  Guess it depends on your preference.  They both agreed it was even better the next day. 
 
 
The clean up.  Serve it warm or cool.  With or without ice cream.  Morning, noon or night. 
 
Enjoy-
Teddra