Tuesday, July 31, 2012

Design Principals

Hello!  How's your week going so far?  Do you have Olympic fever yet?  I spent a great deal of time over the weekend watching a variety of sports that are only available every four years as well as my daily St Louis Cardinals baseball game.

I do have a little something new to share with you tho.  I signed up for an on-line class to learn a little more about design principals.  The class is five and a half weeks long and is taught by Britta Swiderski.  You can learn all about it by clicking right HERE. 

This is the tag I made from the introduction.


In addition to the individual projects for each lesson, we're making a tag book focusing on the teaching elements that each lesson is built around.  I used inks in blues, greens and purples for the background and some new orange Washi tape. 


The first full lesson was posted yesterday so I'm off to check out the videos and get inspired!
See ya tomorrow!
-Teddra


Saturday, July 28, 2012

The Best of the Rest

Hi and welcome to the final entry of 'The Best Of' series from Adventures In Baking.  This category features all the remaining recipes .... the candy, bars, brownies and miscellaneous items that don't really fit into any category.  This is the kitchen sink of recipes if you will.  There are 9 contenders in this category and there's such a variety, it's difficult to rank them against each other.

Picking the top two is a breeze, they're the Raspberry Shortbread Bars I made in March and the Strawberry Jello Pretzel Squares I made in May.


I made the Shortbread Bars again in April using Strawberry jam instead of Raspberry.  My parents scarfed them up, LOL!  They're very rich and buttery, but oh so yummy.  You can read all about the bars by clicking here


The Strawberry Jello Pretzel Bars were so good, I didn't even take the time to take a good photo!  Just thinking about the sweet and salty goodness of this dessert makes me want to make it again!  You can read all about this one right here. 

Next up we have the desserts that, while they might not have been favorites of mine, they earned top reviews from my taste testers:  Cookie Dough Truffles, Chocolate Covered Pretzel Peanut Butter Bites (longest name ever, lol) and Banana Pudding.


I made the Cookie Dough Truffles in February, just before Valentine's Day.  It was fun to play with the chocolate melts and mix up the colors, but the truffles are way too sweet for me.  My taste testers took these home with them.  You can read all about these little beauties here


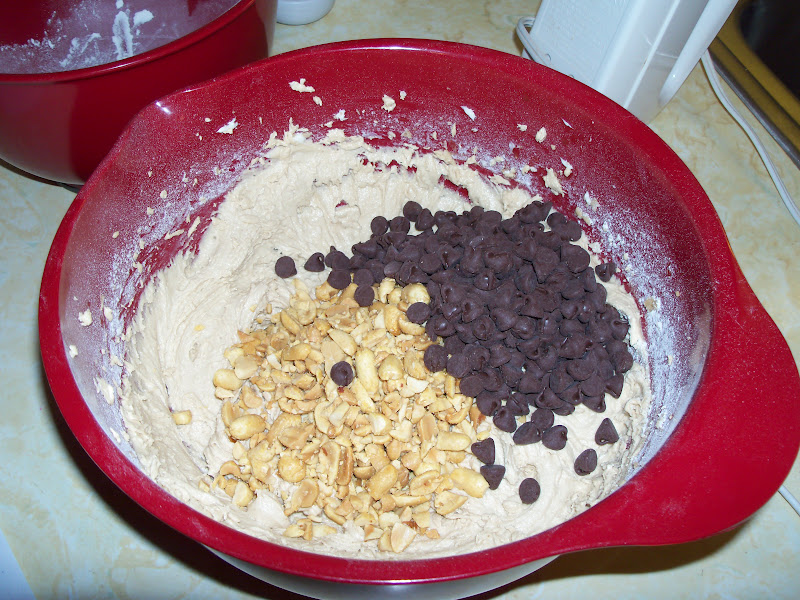
The Chocolate Covered Pretzel Peanut Butter Bites were a hit as well.  It's a good thing the recipe made such a huge amount of bites so they could be shared.  Everyone that tried them took a dozen, or two, home with them.  If I had to choose one to make again, it would be the white chocolate.  The coating wasn't as heavy as the other colors.  Click here to see how I made them.


And then we have the Banana Pudding I made for Father's Day in June.  This is the one Adventure I didn't fully embrace.  I enjoyed the process of making pudding from scratch and whipping the meringue, but I just couldn't bring myself to taste it.  But I have it on good authority, from two seasoned banana pudding aficionados, that it was superb.  Read all about the process here.

And that leaves us with Red Velvet Swirl Brownies, Candy Bars, Brownies and Raspberry Pecan Blondie's.  I learned something from each of these recipes but I just didn't like any of them enough to try again.


What did I learn from the Red Velvet Swirl Brownies?  I learned I like my brownies with some chocolate!  Although the swirl was kinda awesome.  Check out my Swirl Adventure here.


And here's the Candy Bar.  Loved the bottom oat layer.  All the chocolate, peanut and butterscotch on top, not so much.  It was just too much of a good thing.  And there wasn't really any baking involved.  And I swear the pan weighed 50lbs.  Check out everything that's poured into the bars here.


The Chocolate Chip Brownie recipe was a mixed bag for me.  The brownies were terrible but the chocolate chip cookies made with the leftover bottom layer were excellent.  If you're looking for a good chocolate chip recipe go here.


And that brings up to the final Adventure in the review, Raspberry Pecan Blondie's.  I had high hopes for these but was disappointed.  They didn't bake evenly and the raspberries were pretty, but didn't add much flavor.  One final link for ya, here, and that wraps up The Best of the Rest.

I'm four recipes into the second half of the year and I've already had some hits and some misses.  But the Adventure must continue! 

Here's a little sneak peak at the next episode..... enjoy! 


Till next time
-Teddra


Wednesday, July 25, 2012

Toffee Squares


Hello!  Welcome to Adventures In Baking.  This week's adventure started with this recipe right here.  I was reading through a few of my daily blog rolls and the photo of the squares just called out to me.  With all the cookies I've been making lately, it was definitely time to go in a different direction.


The ingredients.  All ya gotta do is look at the recipe and know these squares are gonna be loaded!  Peanuts, chocolate chips, pecans, butterscotch chips and coconut. 


Let's get started.  Whisk together flour, baking soda and salt.  Set aside.  It said whisk.  I used a spoon.  I have a whisk.  It was about two steps away.  The spoon was one step away.  It was 10pm at night after a long day at work.  I grabbed the spoon. 


Next step.  Beat butter until light and fluffy.  Add brown sugar and continue beating until creamy.  Add eggs, one at a time, mixing well after each addition.  Mix in vanilla.  So far it's pretty much the same as any basic cookie recipe.


Final step.  Gradually add flour mixture, mixing until almost blended.  Stir in peanuts and chocolate chips.  Yep, still a cookie recipe.  Transfer dough to pan and spread evenly.  Sprinkle top with remaining chocolate chips, butterscotch chips, pecans and coconut.


Taste test.  This is the Adventure part of Adventures In Baking.  They taste like a chocolate chip cookie with stuff on top.  They're ...... OK.  Nothing special.  And with all those toppings I expected this to be special.  And why are they called toffee squares?  Where's the toffee?  Yes, Aunt Shari, you could leave off the coconut.  The butterscotch chips smell divine.  I may have to look for a few more butterscotch recipes just so I can smell them again!  Would I make them again?  Probably not. They have the potential to be great, they just didn't work for me. 


The clean up.  The recipe said to use a 9-inch square baking pan.  I have an 8-inch pan, but not a 9-inch one.  I learned my lesson early in this adventure that a smaller pan is not substitutable unless you want a hot mess.  So I used a 7x11 pan.  9 inches square = 7x11.  Right?  18 inches total either way.  Anyway, that's what I did.  After the directed 35 minutes, the center was still visibly jiggly.  After 20 additional minutes, it wasn't quite as jiggly, but I was worried about the sides and bottom being burned.  I cut around the middle and the edge pieces are pretty good.  When I had this 'not fully baked in the middle' problem before with both brownie recipes, I thought the problem might have been the pan I was using.  I generally use Longaberger pottery.  It's oven safe and cleans up very well.  But even when I used my clear Pyrex dish for one of the brownie recipes I had the same problem.  Maybe it's just the oven.  It's kinda old.  Wilma Flintstone was it's original owner. 

Next week, I'm trying to stay away from the cookies again and I think I've found a winning recipe.

Stop back next Wednesday evening to check it out!
-Teddra


Sunday, July 22, 2012

PTI Homemade Embellishments

Whew, what a weekend full of craftiness!  I have one final project to share before I have to put away all my pretty paper and ink and return to the real world.  To earn the DIY badge, we were to create our own embellishments.  I'm really inexperienced at this as 99% of the cards I make get sent through the postal system so my cards are generally very, very flat. 

I decided to try Dawn's layering instructions to create a few embellishments emphasizing a Military theme. 


Three different dies were used to cut stars, banners and hearts.  The Tiny Tags die has both hearts and stars which provided more options.  The red, white and blue patterned papers are a mixture of dots, grid and flowers.


I mixed and matched and moved the pieces around until I was happy with the results.  The tiny top layer is popped up with foam squares.


One final step was to give a slight curve to the tips of the stars.

Supplies used:
Patterned paper:  In Bloom, Bitty Box, Bitty Dots
Dies:  Tiny Tags, Seeing Stars, Banner Builder

DIY-Badge
Well, that's it for me. 
Thanks for stopping by
-Teddra

PTI Mini Book Challenge

Just stopping by to show my progress on the mini book challenge.  It was difficult deciding which technique to try and I finally decided Heather's book was the one for me.  I'm not finished yet, but I'm well on my way.  Here's a little progress report:

Selecting the photos and laying them out.  I'm making a 6x6 book so the photos are printed in wallet size.

Next, cutting all the pages as well as a front and back cover.  I cut 9 pieces of  Melon Berry cardstock at 6x7 for the interior pages and 2 pieces of Kraft cardstock at the same size for the covers.  I used a 6x6 chipboard template and a hole punch to space the binding holes.  The long side of each paper was scored at 1 inch so my book would fully open and be able to lay flat.


Adding the paper.  The theme of the book is an RV trip to visit several National Parks out West and PTI's Road Trip patterned papers worked perfectly.  The first and last interior pages are fully covered and the remainder each have a 3x6 strip of paper on the outside half of the page. 


Here's the first two pages in their basic form.  I just need to add a little journaling and embellishments and I'll be done!


This challenge is for the Memory Preservation badge.  Memory-Preservation-Badge

PTI Tie-Dye Technique

Back again with the coolest card ever!  Three techniques were presented to create a tie-dyed focal point.  I choose to use the most basic technique which incorporated ink, water and a paintbrush. 


The colors are so vibrant.  It reminds me of the sun and stars.  Can't wait to try this out with a few more colors.  With this card, I earned the Rainbow Badge.

Rainbow-Badge

Supplies used:
Cardstock: Hawaiian Shores
Stamps: Frame It's #2
Die: Holiday Photo Finishers
Ink: Harvest Gold, Spring Rain, Hawaiian Shores

PTI Card Set Challenge

Hi, I'm back with the final challenge I finished last night.  This card set was created to earn the Correspondence badge.  I fell in love with Betsy's card set and wanted to try it for myself.  I didn't have the stamp and die set she used and I had a difficult time finding a set that would work.  I tend to either purchase the stamp set or the dies, but not both.  I finally settled on the Sending You set.  I was a little worried it would be too plain, but I think they came together nicely.


I apologize for the crookedness of that little Melon Berry card.  It would not cooperating for it's photo shoot!  It won't stand up on it's own and wouldn't even stay straight on the pin stand!  (Just think of it as the spirited little brother that thinks it's hilarious to make a funny face while you're trying to take a family photo.)  And here's a close up of the Pure Poppy card:


Supplies used:
Cardstock: Stampers Select White
Patterned Paper: Green Tea Leaves
Stamps: Sending You
Die: Sending You
Ink: Pure Poppy, Ocean Tides, Dark Chocolate, Melon Berry, Ripe Avocado
Correspondence-Badge

Thanks for looking!
-Teddra

Saturday, July 21, 2012

PTI Limited Supply Challenge

I'm back with a card created for the limited supply challenge at Papertrey Ink.  We were limited to the following supplies:
Stamp: Natural Beauties (or any floral set)
Cardstock: White, Hawaiian Shores, Aqua Mist, Simply Chartreuse
Ribbon:  Hawaiian Shores Bitty Dot
Buttons:  Simply Chartreuse
Ink:  Any
Dies:  Any


I really like how it turned out.  Totally not my style.  I don't have the Natural Beauties stamp set so I used the only floral set I have, Botanical Silhouettes.  Here's a little closer view.


Supplies used:
Stamps:  Botanical Silhouettes
Cardstock: Stampers Select White, Hawaiian Shores
Ink:  Hawaiian Shores, Aqua Mist, Simply Chartreuse, Hibiscus Burst, Raspberry Fizz, Harvest Gold, Tuxedo Black by Memento
Dies:  Angled Label
Craft-Conservation-Badge


PTI Summer Camp Knots Badge

Hi and welcome!  Today I have the opportunity to take part in Papertry Ink's Stamp-A-Faire 2012.  This years theme is Summer Camp.  There are videos and tutorials being posted throughout the day and you're able to earn camping badges with each project completed.  How fun is that!  You can check it out for yourself right here

The festivities started with a ribbon techniques challenge.  Each designer demonstrated a unique way to use ribbon on a project.  I was inspired to try out Erin Lincoln's masterful use of twill ribbon.

And here's a close up showing the use of Harvest Gold, Pure Poppy and Simply Chartruse ribbon along with the Vintage Ornament dies.


I was hoping I'd be able to sneak in a few Christmas cards with the variety of projects today and I was able to do just that on the very first challenge.  Yeah, I earned my knots badge! 
Knots-Badge
.
See ya back here soon
-Teddra


Friday, July 20, 2012

Project Life Update #2

Hi!  These past two weeks have been crazy so I haven't been working on anything new but am hoping to get back on track starting this weekend!  Here's a quick look at a couple more Project Life layouts from the first 6 months of the year.  This is the jello pretzel dessert I made right around Memorial Day.  It's also the layout that I started using Washi tape.  Why did I wait so long to get on the Washi train?


And then this one that may just be my favorite all-time (so far, haha).  I just love the colors.  And the cookies were good too!


Enjoy your weekend!
-Teddra

Wednesday, July 18, 2012

Oatmeal Cranberry Cookies


Hello and welcome to this weeks Adventures In Baking.  I seem to be on a cookie kick here lately and one of my favorites is Oatmeal Cookies.  Without Raisins.  My Mom knows how much I love oatmeal cookies so she emailed me the recipe I'm using today and you can find it here on Barefoot Contessa's blog.


The ingredients.  Cookies always have soooo many ingredients.  This one uses rolled oats (naturally), dark brown sugar, cranberries and whole wheat flour.


Let's get started.  Cream the butter with the granulated and brown sugars.  Add the eggs and stir. 


Next step.  Add the cinnamon, baking soda, cream of tarter and vanilla to the mixture.  Stir in the oats.


Final step.  Mix in the all-purpose and whole wheat flours.  Then add the cranberries.  I couldn't decide whether or not to use the whole wheat flour but I wanted to stay true to the recipe.  If you look closely at the above photo, you can see the slight color difference between the all-purpose flour on the left and whole wheat flour on the right. 


Taste test.  The batter wasn't very thick and I was worried the cookies would spread out in the over, but they held their shape pretty well.  The cookies are nice and chewy, just how an oatmeal cookie should be.


The clean up.  The recipe said it yielded 24 cookies.  I made 46.  And these aren't some little bite-sized cookies.  These are full-sized cookies.  I can't imagine how big they'd be to only have 24 cookies.  This would be a good cookie to make using the Whoopie Pie Pan so they'd be nice the thick and chewy.  And they're so good I can't decide if I'm going to take any to work and share or not.  I may just bag some for the freezer!  After I enjoy a few more with a glass of cold milk that is....

I'm heading out of town again for a couple of days for work and I'm anticipating a spotty Internet connection.  But I'll be back as soon as I can with the final 6 month review of The Best of the Rest.
Till then
-Teddra