Thursday, December 16, 2010
Tags
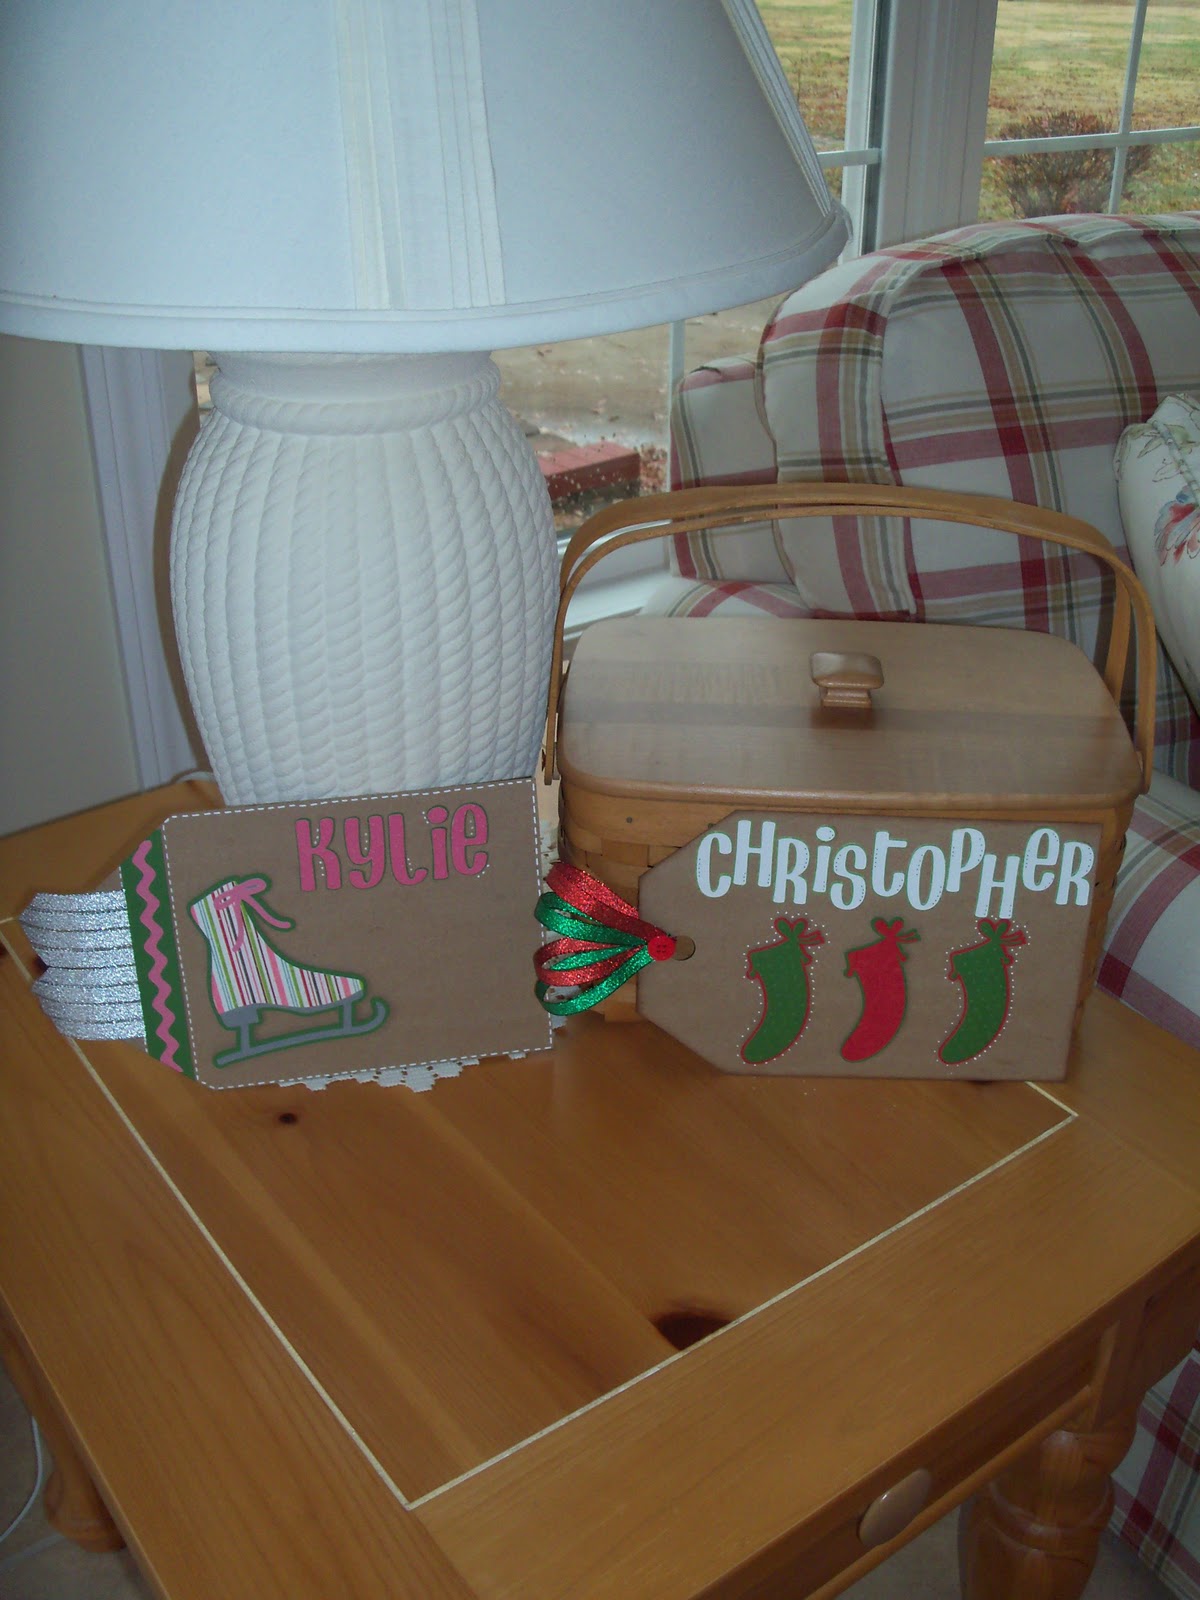
I made a couple of simple tags to go on Christmas presents. The tags were cut from Tags, Bags, Boxes and More. The alpha's are from Don Juan, the ice skate and stockings are from Winter Woodlands. Very simple cuts with limited layers and a few ribbons to jazz it up.

Monday, December 13, 2010
Birthday Card
Today is a friend's birthday and I made this card to go in the box with her present.

The base is a five inch square of kraft cardstock. The next layer is colorbok dot paper and then another layer of kraft paper. The kraft layers are embellished with dashes and dots from my white Signo pen. The top layer is a die cut frame from Papertrey Ink. LOVE Papertrey products! The die is Fillable Frames #4 cut from sweet blush cardstock and stamped with the frame and sentiment from the stamp set of the same name in Dark Chocolate. The frame is popped up and a sweet blush ribbon is tied around the mat. Let's hope it gets to her in time with the terrible snow storm sweeping the midwest!
Saturday, December 11, 2010
Gingerbread Frame
Hello again. Just so you know....I have been crafting. However, most of the things I've been working on are for Christmas presents and I don't want to risk posting pictures.
 I do have a little frame to show you today. I used patterned paper from Cosmo Cricket Winter Mittens for the green floral background, red scalloped mat and toasty gingerbread man. The gingerbread man was cut from the From My Kitchen cartridge and the layered scallop squares are from Mini Monograms. I added a few gems and white 'frosting' to the image and a small strip of Ripe Avocado twill ribbon to the bottom to finish it off. It's now hanging in the kitchen, the perfect place for a gingerbread man!

Wednesday, November 3, 2010
Embossing Storage

Tuesday, October 26, 2010
Paper Pumpkins

Super Simple and aren't they cute-I especially like the curly stem on top! This picture was taken before gravity worked its magic on the largest, but the other two are holding up well.
Monday, October 11, 2010
Halloween Hanging

Happy October! I've been in the Halloween mood for several days now and completed a few cards along with this wall hanging. I used three chipboard circles that were purchased at CKC last April. I was able to cut the designs out fairly large because the circles are just over 11 inches in diameter. My favorite is the raven in the tree in shades of purple....spooky! Here's a closer look..

The large images (witch, pumpkin and tree) are pop dotted off the background. The individual circles are attached with ribbon and I added a simple loop to the top. I've been having difficulty finding green cardstock paper. The green I used is practically glow-in-the-dark so the tree looks like it's oozing lava! Wish I had used yellow instead, but live and learn, right? Thanks for looking!
Wednesday, September 15, 2010
Bright and Cheery

For the past few days, the weather has been cloudy and gloomy and I decided to scrap my way to brighter days. I used some bright, fun papers from the Delovely collection by Cosmo Cricket to decorate a 6x6 chipboard book I found in the dollar bin at Michael's (I've made some great finds there lately!). The five pieces of chipboard were attached with a binder ring in the upper left corner, but I wanted mine to be able to stand up, so I used the crop-a-dile to punch holes in the lower portion as well.
The photos I chose to use were from the first 'Girls Weekend' my mom and I took to Dresden, Ohio. For three days we shopped. I'm not kidding. I couldn't even begin to guess how many bags we had - the truck was full! We spent the first two nights in a hotel, but decided to change things up and spent the last night at a local bed and breakfast, The Inn at Dresden. It's a beautiful property set high on a hill. I thought the hill was scary going up, but that was easy peasy compared to driving down- Yikes!
Tuesday, September 14, 2010
Altered Card Box

Monday, September 13, 2010
Christmas in September?

Actually, it's been Christmas since January for me! Last year, I was barely able to get my cards out before January and the fact that they were made at all is due to taking my supplies on a business trip and working on them at night in the hotel. The cards were OK, but not my best work. I generally send out 25-30 cards a year, so I decided to make the commitment to complete at least 2 cards per month for 2010 and figured that would get me close so I wouldn't be struggling in December to finish cards and projects.
I've done really well as I now have 23 Christmas cards ready to go! I did only two cards most months, but since I can make 4 cards almost as easily as 2, a few months slipped in with extras. The above card is one of 6(!) I completed for September. I used a really simple design and mass produced the cards using only 2 pieces of solid cardstock for the base, two sheets of double sided cardstock for the main focus and a page of die cuts for the embellishments. By using both sides of the patterned paper, I was able to make all six cards a little different. Add a little ribbon and a Merry Christmas stamp inside the card and they're ready to be mailed!
Sunday, September 5, 2010
Baby Shower Gift

I purchased this painters tray months ago but hadn't used it for anything. I received an invitation to a baby shower and decided it would make a nice shadow box for a baby's room. The mom is decorating the room in pink and brown so I used a rich chocolate brown as the base piece behind each rectangle to ground it a little and give some separation between the white tray and the lite colored papers. The papers are from a baby girl stack I picked up on sale at Jo Ann's. I added a few embellishments, but wanted to leave space for the baby photos and journaling of first impressions, date of birth, weight and height. I have some chipboard letters that I want to use to put on the little hanging tag, but they haven't decided on a name yet so that will be added later. I also finished the frame off with chocolate ribbon around the sides.
Thursday, September 2, 2010
Best Friend

This is Theo. He's my most difficult subject to scrapbook. When my brother and I were kids, we didn't have any pets because we spent so much time out of the house between school, piano lessons, sports and camping. As a result, we both adopted dogs in our early 20's. His first fur-kid was a bulldog named Ella and he's now the proud papa of two labs, Apollo and Alana. My dream dog was a Shar-Pei. Theo passed away 5 years ago after a full life of chasing squirrels, riding shotgun in the truck and catching an afternoon nap in front of the fireplace. I still miss him each and every day. I have tons of photos from every stage of his life, so you'd think scrapbook pages would be easy. Not so much. I've purchased enough dog themed products over the past 10 years to use every photo I have, but my head goes to another place when I start looking through the pictures, I loose all desire to put them on paper. Does anyone else have this problem?
This layout is one of my favorite photos of him because it's so funny. It looks all sweet with him peeking out from the flowers with his head tilted. It reminds me of having professional photos taken where the photographer tilts your head to some unnatural angle and you end up looking like you're very pensively starting into space. I find it extremely funny because it's all an illusion! More than likely, someone was holding food in front of him and that's what he's staring at so longingly. That it happened to be in front of a flower arrangement is irrelevant and just added a natural embellishment. I know I'll love the album when I'm finished and treasure it forever. Thanks for looking.
Wednesday, August 25, 2010
Wall Hanging

This is a small portion of a wall hanging I made a few weeks ago from a Bo Bunny kit. The back pieces are 6x6 bare naked binder pages. Kits are easy peasy and I really like to use them when inspiration is taking a holiday! All the papers and embellies are already pulled together, but there's still room to use a little imagination and put your own spin on the project.
Currently, my craft room is dismantled and I have supplies spread out through two rooms, my computer in a third room and the table space I'm using in yet another place. Gathering all the products I want to work with and getting set up in the temporary space seems like a lot of work, so this wall hanging kit let me do a little scrappin without a big mess. Enjoy.
Wednesday, July 21, 2010
It's a Jungle Out There

I love, love, love the calendar page for June. I used papers from the July Club SEI kit. I was a little leary at first with black, orange and green. I didn't want it to look like Halloween in the middle of summer! Did I mention that I LOVE this page? The lime green background has glittered flowers and the orange just pops off the page.
Saturday, July 17, 2010
May Calendar

I'm really making some progress this week! This is the peak of the May calendar page. It is not one of my favorites. I might even venture to say it's my least favorite. It's made with yummy Basic Grey papers, but they blend together too much. Nothing 'Pops'.
Thursday, July 15, 2010
April Calendar

I'm trying to catch up on the pages for Project 365. Here's the first of the April pages. The paper's used this month are all soft and pastel with a little bling to liven it up. You can never have too much bling.
Father's Day

Yes, I realize I'm a month behind in posting a Father's Day project. That's just the way my life's working right now.
I wanted to do a fishing themed present for my Dad this year. He utilizes the 'catch and release' method of fishing so I like to tease him that he's just catching the same fish repeatedly, but he swears they're different.
I found this clear paint can at my LSS so I thought I could decorate it and fill it with fish-y goodies. I thought the difficult part would be the can, but I think I was more stressed trying to find goodies for inside! The shopping list starts off easy....Goldfish crackers, Swedish Fish gummies ..... ummm ...... ummm ...... uh ..... Yeah, you see the problem. What I thought was a great idea was quickly becoming a stressful situation.
So the goodies went on the back burner and I started designing the bucket. I found some cute background paper that works really well for a pond scene rather than a beach or ocean theme as it was probably intended. I used my Cricut and cut the fisherman paper doll with the fishing rod and the sign post. I also cut multiple Catskill's and layered them for the bottom border.
I think it turned out pretty good and I definitely learned a few lessons to use on my next paint can project.
As for the goodies....the bright idea light bulb just wasn't working so I decided I'd use a couple different flavors of the Goldfish crackers. Granted, it's been a long time since I was in the cracker aisle, but I had no idea how many varieties there are! I ended up with Extreme Cheddar, Cinnamon and Smores! Smores are a combination of graham cracker, chocolate and marshmallow. I thought it kinda went with the theme....Smores remind me of campfires, which reminds me of camping, which goes right along with fishing! Ta Da!
Wouldn't you know it, the same day I purchase the crackers and put the final touches on the bucket the light bulb makes an appearance. Turtles! After a quick trip to the candy shop, a few turtles were added to the mix. Crackers, chocolate and caramel - sounds like a pretty good Father's Day to me!
Sunday, June 13, 2010
Anniversary Cards

This first card is for my parents 44th wedding anniversary. I used Bo Bunny Jazmine papers and chipboard pieces. The inside sentiment was typed in Word and printed out in purple ink.

The second card is for my Aunt and Uncle's 50Th wedding. Their three kids (and grand kids) planned a nice celebration party for friends and family at a local church. I used a piece of patterned card stock as the card base and didn't embellish too much so the design on the paper could be the focal point. I did think it needed a little something, so I cut a monogrammed H, for their last name, and tied a little ribbon. Again, I typed the sentiment and printed it out on my computer. I don't know why I never tried that before, but I'm really diggin it - No more crooked writing inside the cards! Go me.
Thursday, June 10, 2010
Miss Me??
I haven't posted in over a month! I made a few things during the time away from the blogging world, but I guess I just needed a break and I haven't been very inspired. This past month has been crazy (and not in a good way). I was discussing my non-scrapbooking mood with a friend earlier today and she said something that made a lot of sense. We both tend to dive into scrapbooking as an escape and to get away from everything else. Lately, I haven't had anything to 'get away from' and have much more spare time on my hands than I think I've ever had. **Side note: I have the best maintained yard in the neighborhood. Hehe.**
So, to catch you up on the few things I have created, I'll start with my Mother's Day card and gift. I loooooove how the frame turned out. I purchased a scalloped acrylic frame at the CKC I attended in April with the intention of making this project. I knew I wanted to either use a family photo or a photo of my brother and I. Problem is, it has been YEARS since we've had formal photos taken and, even though I consider myself pretty close to my brother, we don't have many photo opportunities with him living in Hawaii. The family photo I ended up using was taken for a church directory. I'm not sure of the year, but I'm guessing it was in the mid-80's.

I used a curvy cutter to cut the photo into a circle and to cut the yellow photo mat. The photo and strip of paper are matted on the striped background paper and attached to the back of the frame with glue dots. I loved the flourished bling in the package and on the display projects at CKC, but the reality is they are so difficult to lay, I almost ruined the entire frame. I added gemstones on the corners to cover the glue dots and added the prima flowers to give it a little more color and tie in our red sweater vests. Sweater Vests! Ha! The final touch was the silver butterfly that I picked up at CKC.
Here's the Mother's Day Card. It doesn't go with the colors in the frame at all. I wanted the frame to coordinate with the colors of the family rooms in the house, but wanted the card it be light and spring-y.

Thanks for looking!
Sunday, May 2, 2010

Birthday Card

I made a birthday card for my brother's girlfriend, Lan. I've never met her so I have no idea what colors she likes or if she's a girly-girl. I decided to play it safe and went with a simple cupcake. I used Wild Card for the base and then cut the wrapper, frosting and candle layers in various papers. I added bling to several of the frosting dots, but thought it needed something else. I went digging through my embellies for a little something extra and found this cute crotchet flower in bright colors that I really like. Hope she likes it.

Saturday, April 24, 2010

I recieved a Bridal Shower invitation this week for a friend I haven't seen in quite a while. Unfortunately, the shower is in Lexington, Kentucky and that's just too far to go since I won't actually get to spend any quality time with her and probably won't know anyone else there. I want to send her a Congratulations/Best Wishes card and this is what I came up with. I plan on adding a giftcard to someplace she's registered, but I can't remember the stores! (I carried the invitation around the entire state of Indiana this week so I could remember to RSVP, and now I can't find it!)
I didn't add any faces to the bride or groom because I was afraid it would look odd and then I'd have to start all over! What do you think? Is it OK the way it is? I also dressed up the inside a little bit since it's so pink. I plan on writing a short message, but I haven't made up my mind on exactly what I want to say yet.

Sunday, April 18, 2010
Vinyl

I've had this piece of black vinyl for 6 months but didn't know what to do with it. I received it free from Scrapbook Factory in O'Fallon and it came with a sheet of transfer paper and a piece of hard plastic. I've seen quite a few different ways bloggers have used vinyl, but I just wasn't sure about cutting it. So what's a scrapbooker to do when they need ideas or tutorials? Go to You Tube, of course!
I watched a couple of tutorials and now understand what settings to use to cut the vinyl but not the sticky backing and how to use the transfer paper. I still have no idea what the plastic piece is for. There are several cute sayings that make really cute wall art, but I only have a 12x12 sheet so I can't do too much. I did discover an awesome phrase that I'd like to make for my scraproom once I move (or decide to stay......Ugh). Anyway, I decided to start out small and just cut a frame around the word Inspire to decorate my Expression. It turned out exactly like I wanted and was so easy to do. I will definately cut more vinyl in the future.
Spring Fever
Another two weeks without a post. Must be Spring Fever! So much has been happening the past few weeks I haven't really done any scrapping. I went to CHA in St Louis last weekend.
I registered on line for three classes on Friday, but the first one was at 8:30am so I went down the night before (and used one of the many free hotel nights I've earned from work). The first class was called Sketchabilities and was sponsored by Keller's Kreations. I'd never heard of Keller's before, but she has some cute projects. The class lasted an hour and we were given four two-page layouts. I didn't really get them done because you need to have your photos for the layouts to work. I really liked the idea behind the layouts. She uses a lot of circles.
The second class was called Stand up and Be Noticed (or something like that) and was sponsored by SEI. I belong to Club SEI so I was really looking forward to this class. The class kit was an acrylic album with embellies in browns, pinks and peaches. The hardest part was connecting the 5 panels together....it took 20 minutes! This class was also an hour so I didn't get the entire project finished. I think out of the 10 sides to the album, I finished 4 or 5. As a bonus, we were given an extra 6x6 paper pad of the paper line and I won the final prize drawing for the class and won an entire scrapbook kit that included a 12x12 album and papers and embellies for 20 pages.
The final class was called Everything Pops and was also by SEI. The kit for this class was actually the July kit from Club SEI. Since I just joined the club in February, I hadn't seen this one. There were a ton of projects included. The class was packed and the teacher had trouble keeping everyone going. I accomplished very little in the class, but we were given instructions so I can complete everything.
Overall, I'm glad I went, I had a good time and I'd do it again.
I was really getting behind on Project 365 so it was my intention to catch up with March and April on Sunday morning. I downloaded the photos that I needed and went online to Walgreens. Usually the photos are available to pickup within an hour, but they weren't going to be ready till Monday at 8:15...PM! That wasn't going to work, so I didn't do any work on Project 365.
This weekend has been about Spring cleaning and packing. I'm only half-heartedly packing because I have not idea when, if or where I'll be moving.
Well, that's all for now. No photos because nothing's finished! Oh yeah, I was going to work on the CHA projects last night after the Cardinals baseball game, but the game wouldn't end! Cardinals - Mets, 20 innings, 7 hours, lost 2-1. Bummer.
Wednesday, April 7, 2010
Super Size Post
Wow, I can't believe it's been so long since I posted any projects. Rest assured, I'll be making up for it right now!
First off, here is the first page to March. I'm using green papers this month, but starting dark and going to lighter greens at the end of the month; It's my take on 'In like a lion,out like a lamb'.

My friend Jennette recently got married and this is the card I made. I sent it in a box along with an Easter card for her son Christopher, who is 5. The carrot is actually the cake box from Tags,Bags,Boxes and More. First, I cut it out in orange cardstock so the box would be sturdy and then I cut it out again in orange patterned paper and inked the edges. I added some green ribbon out the top to make it look more like a carrot. The carrot is filled with hershey kisses. Of course when I purchased the chocolate it was only 40 degrees outside and the week I mailed it the temp reached the high 60's. Hope it didn't melt.


This is the Easter card I sent to my parents in Florida. The flowers were cut out of the card and I used pink and green cardstock behind the cutouts to give the flowers their color. I love the paper design on the inside of the card so I kept the sentiment on the left to cover all the flower piecing.


I bought this Basic Grey kit at an awesome store in Bloomington, Indiana last year. It came with a round album, 6 x 6 paper pad, brads, rub-ons and a sheet of letters. I think it was designed to be for a teenage girl with a different friends photo on each page and little embelishments like a phone, lipstick, high heels, etc. I followed in instructions as far as which papers to use on each page but that was as far as I was willing to go. I didn't really have anything in mind to use it for, so it's sat on the shelf in it's unfinished state just waiting for a lightbulb to go off in my head. Finally, it happened one cold winter day driving across Interstate 64. I'll print a few photos of my friends new baby and give it to her for her first Mother's Day. So, here it is....Emma's Book. Hope you enjoy looking at my projects. Let me know what you think by leaving a comment.


Saturday, March 20, 2010
Project 365 February

I love the February pages. Lots of pink, flowers and bling!

When I'm looking at paper, I always gravitate toward Basic Grey. I knew I wanted to use this paper, but it's so busy I was afraid it would overwhelm the pictures. I had the bright idea to cut out the top note shape and then I had the even brighter idea to use the negative. This way, I still have 2 top note shapes of this gorgeous paper to use for something else.

Guess I was getting a little lazy in the layout department with the last two pages. I used the same principle from the previous pages, but actually used the scalloped circle cut this time. I was even able to incorporate the negative on this page as well. I cut the negative down by an inch which allowed the brown background paper to show through and define the shape.

Birthday Card for Grandma

I'm baaaaaaack! I haven't posted in a while because I didn't have internet for 5 days!
Last weekend was miserable without any internet connection and the frustration with Comcast attempting to determine the problem. I had to give myself several time-outs on Saturday between Comcast techs! Finally, I was connected to Holly. Holly rocks: She listened, ran a few tests and told me how to fix it in less than 15 minutes - and that includes the five minutes it takes to go through the menu to get to an actual live, talking person. If only I'd talked to Holly first instead of the other jokers that call themselves techs......
On with the Scrapbooking.....When I wasn't being tortured by the IT department at Comcast, I did finish up a few projects. I always seem to have 2 or 3 (or more) projects in the works. If only the available time I have to scrapbook was equal to the project ideas I have.......Guess I may have more time on my hands than I want here soon, but that's a story for another day.
I made a Birthday card for my Grandma using leftover scraps from the album I made for her. I took quite a few photos of the album pages, but they're terrible! A photographer, I am not. It's partially the lighting and partially the blurry-ness. I'm hoping that once the weather improves and the sun comes out, the lighting problem will be fixed. As for the blurry....anyone have any helpful hints??
Sunday, March 7, 2010
Surfer Boy

Here's a birthday card I made for my baby bro. He lives in Hawaii and loves to surf. I thought this paper was very tropical with the hibiscus flowers.

I added a sandbar and palm tree to the inside. I attempted to make the surfer boy look like him with the dark hair and yellow board shorts. Hope he likes it.
Grandma, Take 2

A few weeks ago, I posted an album I made for my grandmother for Christmas 2008 and I explained that a second album was in the works. I finished it this weekend and wanted to post a few pages. I'll post more next weekend.


Monday, March 1, 2010
Fun In The Sun

Whew! It has been a super scrappy weekend! I feel like I've accomplished quite a bit and cleared off a few of the partially completed projects I had going.
This post is another cascading album I started last spring. I know....talk about procrastination! But here's the thing, I love designing the projects whether it's a card, layout or mini-album but I never seem to add any pictures to them! This is actually what started me down the road to Project 365. Repeat after me....I must take pictures, I must take pictures....you get the idea.
Anywhoo....A cascading album is usually made from chipboard and the sizes of the pages are staggered with the front being approx 7 inches wide and the last page approx 11 inches wide. They originally were only available in brown cardboard color, but Bo Bunny has designed several colored albums where the pages can be mixed and matched. Here's a photo of a mixed green and white album so you can see what it looks like when I start out.

Here are a few of the COMPLETED!! pages from our trip to Miami last February. I wasn't on the whole 'must take pictures' train yet, so I didn't have a lot to work with, but I think it turned out OK. I really wish I'd used a digital camera for the sunset photos at Key West. I used my phone to take the pictures and they look really great when sized at 2 inches, but when enlarged to actual photo size just get all blurry. Lesson Learned.


This last page actually has a pocket between the wave and red section and it's the perfect size for my map of the Miami area that's falling apart at the seams because we used it so much. I don't think I've ever navigated so much in my life! I may have taken us on a few wrong turns, but we made it to where we were going eventually!
Sunday, February 28, 2010
Sweet Cards

Just a few cards I worked on today. They're made from Basic Grey papers and chipboard pieces. I love Basic Grey's shabby chic paper designs. I made a total of 8 cards, but I didn't want to post all of them because at least a few will be mailed in the coming months.
Subscribe to:
Posts (Atom)